 |
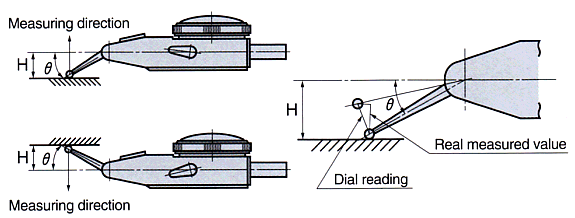
In case they are not perpendicular, a correction by the following formula
is necessary: |
|
Due to various measuring direction, the contact point sometimes can not be angled perpendicular to the |
|
measuring device. |
|
Examples the diagrams below, where the measuring prove is set at an non-perpendicular
angles and the |
|
distance between the pivot of the contact point and the measuring device is signified by the letter H: |
|
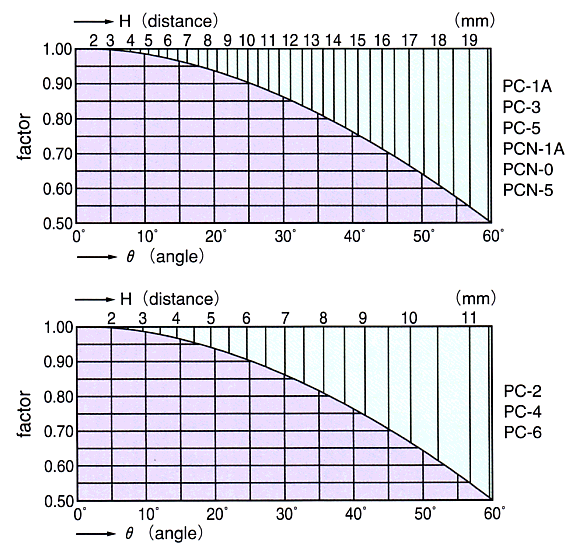
Displacement = quantity of pointer movement × COSθ |
|
 |
|

|
|
| Example: |
| Using a PC-1A indicator, suppose the degree of angle is 3O°and the
Pic Test reading is 0.05mm. |
| The factor for the PC-1A indicator from the graph is 0.87. |
| 0.05mm × 0.87 = 0.0435 = 0.043mm |
|
|
|
 |
When modification is not necessary: |
|
If the measuring tolerance is 10% and the graph factor is above 0.9, modification
by calculation is unnecessary. |
|
|

