| PEACOCK | SINCE 1916 | OZAKI MFG. CO., LTD. | TEL: 81-3-3966-1101 |
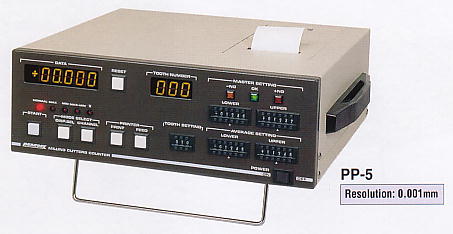
Blade/Tooth Height Counter
PP-5 ; Discontinued
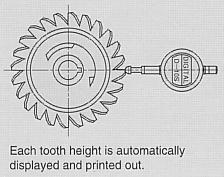
| * Automatically memorizing and printing of Peak of each blade/tooth. * Just by turning the workpiece, automatically measures tooth height. * Equipped with Judgement function OK, ±NG; judgement for mean value is also available. |
 |
Blade/Tooth Height Counter
| Specifications | |
| Model | PP-5 |
| Resolution | 0.001mm |
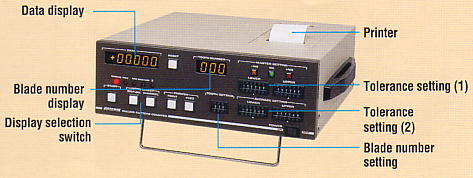
| Display digit | 5 digits with digital switch ±sign(±00.000 to ±99.999mm) Blade number 3 digits display (0 to 120) |
| Blade number to be set |
Set by a digital switch (minimum 1 to maximum 120). |
| Judgement setting (to the standard) |
Set by digital switch -NG, OK, +NG |
| Judgement setting (to the mean value) |
Set by digital switch -NO, OK, +NG |
| Display | * Value ot each height of blade/tooth * Maximum height of blade/tooth * Minimum height of blade/tooth * MAX-MIN value * Mean value |
| Printer function | * All data printing * Each blade/tooth value to mean value * Mean value (Printing is selected by a switch on the back panel. Able to skip printing.) |
| Recording paper | Standard rolled paper 58(W) × 50(D)mm |
| Power supply | AC100V (90V - 110V) 50/60Hz |
| Weight / Outer dimensions |
8kg / 350(W) × 330(D) × 150(H) mm |
| Operation and functions |
* When gauge detects upward displacement of 0.1mm after START, it automatically begins receiving data on the first blade/tooth. When 0.1mm downward displacement is sensed by the gauge, measurement of the first blade/tooth ends. Automatic measurement from the second blade/tooth onwards is similarly performed for the number of blades/teeth you have set. * Measured values are printed upon completion of measurement (when printer is in "ON") (Values out of standard are printed in red) * The first blade/tooth is taken as a reference (0) (It is also possible to make master value as referece 0) |
| compatible Linear Gauge |
D-5S, D-10S, D-20S |
| Options | * RS-232C compliance * Specially designed custom-made jig is available to rotate workpiece for measurement if work sample and drawing is provided. |
 |
|
 |
|
[Back] Product Information Menu
Design and specifications are subject to change without notice for future improvement.
OZAKI MFG. CO., LTD.