 Signal Gauge S-5, S-7, S-9, SC-2A Signal Gauge S-5, S-7, S-9, SC-2A |
 |
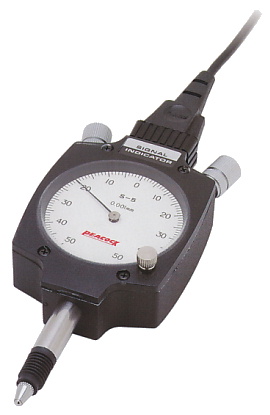
With its high resolution of 0.001mm
scale, it is most suitable for
judgement of the values measured
on finished parts with high accuracy. |
| Model |
S-5 |
| Graduation |
0.001mm |
| Measurement range |
0.1 ( ±0.05 ) mm |
|
 |
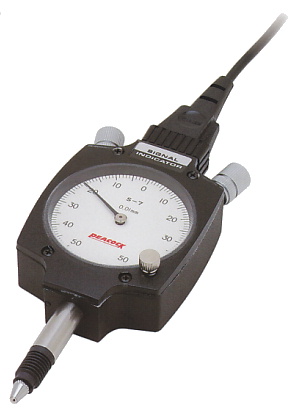
With its resolution of 0.01mm scale,
it is generally used. Its pointer is in
an anti-shock structure so as to
give stable discriminating signals. |
| Model |
S-7 |
| Graduation |
0.01mm |
| Measurement range |
1.0 ( ±0.5 ) mm |
 |
 |
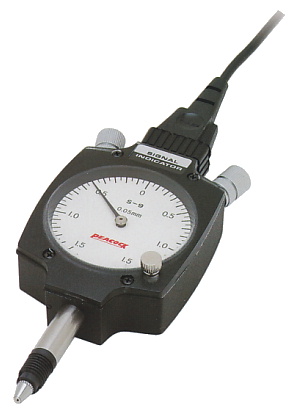
With its most gross scale of 0.05 mm,
it is applicable to select grossly
worked parts and as cast parts at the
low-est costs. |
| Model |
S-9 |
| Graduation |
0.05mm |
| Measurement range |
3.0 ( ±1.5 ) mm |
|
 |
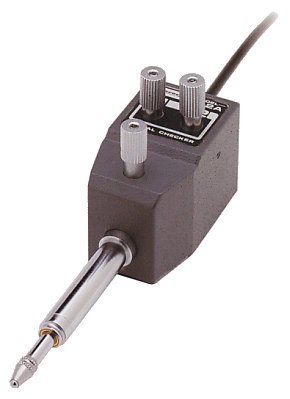
Once its tolerance is set, a dial gauge
is dismounted before using it so that
its endurance is really improved.
With its large tolerance setting range
of 3mm, it is most suitable for
judgement of the measured values in
a wide tolerance range. |
| Model |
SC-2A ( Signal Checker ) |
| Measurement range |
3.0mm |
 |
 Specifications Specifications |
| Model |
S-5 |
S-7 |
S-9 |
SC-2A |
Spindle Movable
Range |
3mm |
3mm |
4mm |
10mm |
| Graduation |
0.001mm |
0.01mm |
0.05mm |
※1 |
Tolerance Setting
Range |
0.1 ( ±0.05 ) mm |
1.0 ( ±0.5 ) mm |
3.0 ( ±1.5 ) mm |
3.0mm |
| Accuracy |
±0.002mm |
±0.005mm |
±0.025mm |
±0.005mm |
| Measuring Force |
Less than 1.2N ( 120gf ) |
| Contact capacity |
MAX DC24V 20mA |
Number of
judgement Stages |
Three stages of -NG, OK and +NG |
| Cord length |
2 m |
| Stem diameter |
ø8 mm |
Operating
temperature range |
0 - 60 ℃ |
| Options |
Code Length 5m 10m / Back cover with Lug (GB-1A) |
Dial gauge for setting |
Dial indicator
for setting |
----- |
Model 107F, 5F |
| Weight |
180 g |
150 g |
Cable signal table |
| S-5, S-7, S-9 |
|
|
|
|
|
 |
(1) |
COM |
[ blue ] black |
|
-NG with (1) and (2) at ON |
| (2) |
-NG |
[ red ] |
|
+NG with (1) and (3) at ON |
| (3) |
+NG |
[ white ] |
|
OK with (1), (2),and (3) at OFF |
| SC-2A |
|
|
|
|
|
 |
(1) |
COM |
[ blue ] black |
|
-NG with (1), (2),and (3) at OFF |
| (2) |
OK |
[ red ] |
|
OK with (1) and (2) at ON |
| (3) |
+NG |
[ white ] |
|
+NG with (1), (2),and (3) at ON |
|
Caution |
 |
When the current of 10 to 20 mA is used to drive a photocoupler, etc.,
the contact
may be worn a little earlier.
|
 |
In SC-2A type, the COM terminal is body-grounded ( If leak current is found
in other
devices, put a gauge into floating status before mounting it ). |
 |
In SC-2A type, a spindle can be set in a range from its free status to 3mm.
Although it may be movable in excess of this limit, you cannot set it in
such an
excessive level in order to protect the spindle. |
 |
In SC-2A type, when a dial gauge is dismounted after setting the tolerance, never
forget to mount a dust protective cap. |
|
| ※1 In SC-2A type, the minimum readable value depends on a dial gauge to be
attached. |
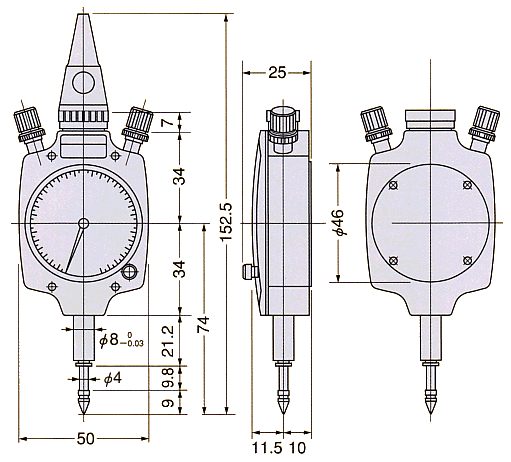
 Outer Dimension ( S-5, S-7 & S-9 ) Outer Dimension ( S-5, S-7 & S-9 )
|
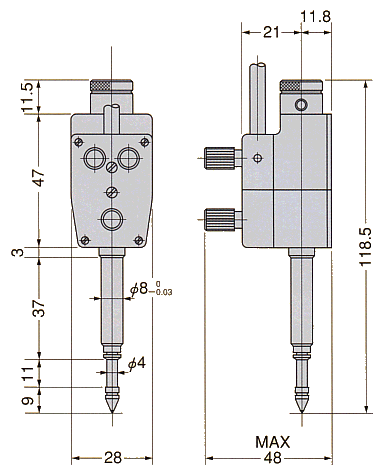
 Outer Dimension ( SC-2A ) Outer Dimension ( SC-2A )
|
|
|

