Having graduated from the Faculty of Machinery, Tokyo Tech High School of Science and Technology, founder Kiyonobu Ozaki who was born in 1894, took over the family business manufacturing scientific instruments. Kiyonobu manufactured meters for automobiles during Taisho Period which was experiencing fierce competition between domestic automobile manufacturers at that time in their battle to develop vehicles. Despite receiving orders from nearly all domestic manufacturers, he was expand his business as designated factory of Army and Navy. After that Kiyonobu turned his attention to dial gauges in 1933, he succeeded in placing the Japanese first dial gauges on the market
The reliable PEACOCK brand is highly acclaimed as being representative of Japan's dial gauges. The name originates from a haiku poem by Shiki Masaoka that goes, "Fanning out its tail in the spring breeze, see?a peacock!" Founder Kiyonobu Ozaki had been interested in haiku since the upper grades of primary school, and he established this trademark for the brand inspired by the neat image Shiki's poem invoked. Manufacturing fine products that resemble the subtle pattern on the tail of a peacock has enabled the company to contribute to society.

Our standard dial gauges continue to inherit the DNA of the PEACOCK brand; the Japan's first dial gauge. Having made repeated improvements and continued with the evolution of this gauge over the course of more than eighty years, they now represent the ultimate in refinement as precision measuring instruments. Not only do they boast high levels of accuracy and superior levels of waterproofing. The model is used on a wide range of different production lines because it is also extremely strong and able to withstand heavy use.

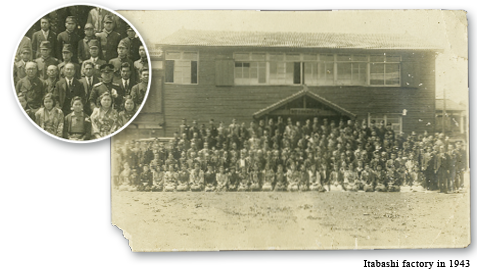
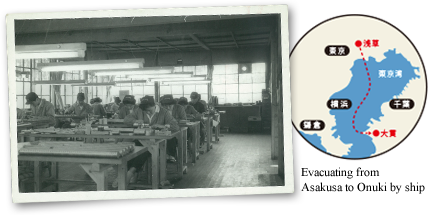
Having been designated a factory of Navy, the Itabashi factory grew to a scale exceeding 400 employees. However, it was forced to evacuate to Onuki in Chiba Prefecture (currently the Chiba factory) in March 1945 due to the ferocity of air raids. The factory mainly concentrated on the manufacturing dial gauges and other precision measuring instruments and also developed pic test indicators, cylinder gauges and signal gauges etc. The industrialization of Japan in the aftermath of the war resulted in the company becoming even more powerful.
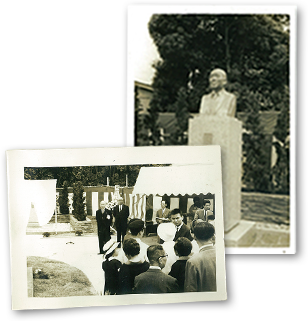
The company's 50th anniversary since its establishment was held at the Akasaka Hilton Hotel in 1966. A bronze statue of founder Kiyonobu Ozaki was unveiled at the Chiba factory. In addition to celebrating half a century of OZAKI MFG. CO., LTD. history, the entire company also worked together for coming era.
The company's founder was passionate about inheriting and developing technology, and he also poured some of this passion into staff training. In addition to creating the company's own textbooks and providing guidance for new recruit study programs, he continued to place enormous emphasis on technical training for every employee regardless of their field of specialization.

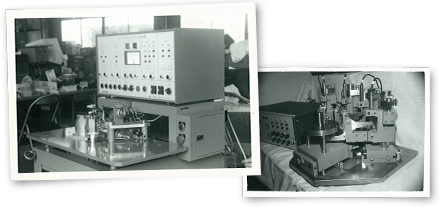
Japan's period of high-level economic growth resulted in a wide range of industries such as Automobile, Machine Tool, Steel, Electric and the Chemical etc. using PEACOCK precision measuring instruments. The expansion of factory automation within industry at that time also resulted in us installing lines for manufacturing semi-integrated valve gauges (photograph on right), video upper-cylinder gauges (photograph on left) and other special products and devices which led to our "Measurement Technology" being used on a wide range of production lines.
A scene (1955-'65) during lunch hour at the Onuki factory (currently Chiba factory) This picture shows the employees relaxing amid the greenery in the large estate as well as employees enjoying with a game of volleyball. We still regularly hold get-togethers within the factory estate today which shows that our at-home style of corporate culture has not been changed since then.
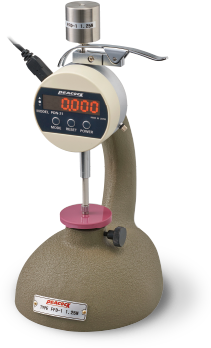
0.001mm resolution dial thickness gauge. This gauge is designated to measure the thickness of minute precision parts, film and special fibers etc. The sensitivity of this gauge is so high that it even affected the zero-point standard owing to body temperature and ambient temperature etc. transferred from user's heat via hand to the frame, so the material used in the frame was improved during development through a collaborative project with Metal Testing Center. We achieved over all conventional instruments after trial and error such as placing the frame in a refrigerator and checking the effects of temperature fluctuations.

A constant pressure thickness gauge is measuring the thickness of various kinds of sheets, films, artificial leather and urethane foam etc. Three different types are available depending on their application and usage environment; The stand type, digital type and the compact type. The specifications are upgraded in accordance with JIS standards, which change every few years and we have continued to clear these stringent standards on a constant basis which has resulted in their levels of quality gaining a reputation for reliability in various range of production environments.
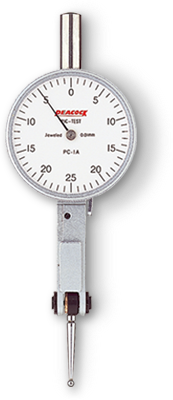
PEACOCK pic test indicators have been popular ever since they were first introduced to the market; so much so that they are now highly acclaimed as being representative of lever dial gauges. They are very useful gauges measuring parallelism and straightness in tight locations as well as deviation of rotary items and the analog display model has become one of our main products. An abundant line-up is available for wide range of requirements including the non-electrifying "U" series for use with electricity discharge machines, the "E" series with extremely low measuring force and "V" series is matched up to the holding assemblies used by the customer
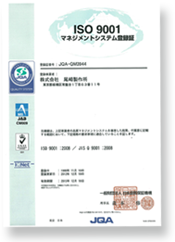
OZAKI MFG. CO., LTD. acquired ISO9001 certification in 1999 which was later upgraded to the 2008 version. We will continue to refine our manufacturing processes in accordance with international traceability standards in the future to ensure that we continue to provide products under the PEACOCK brand reliability that boast stable levels of high-quality and high-precision.
April 1916
Established in Akasaka, Taito-ku, Tokyo (for the purpose of manufacturing scientific instruments by founder Kiyonobu Ozaki).
September 1923
Moved to Nakamaru-cho, Itabashi-ku, Tokyo due to damage inflicted by the Great Kanto Earthquake.
1927
Succeeded in developing Japan's first prototype dial gauge.
1932
Started mass-production of dial gauge
May 1933
Registered "PEACOCK" as trademark
January 1939
Changed organization to a limited company named OZAKI MFG. CO., LTD.
1940
Designated a factory of the Ministry of the Navy and designated an excellence factory by the Ministry of Commerce and Industry
1945
Moved to Onuki-cho, Chiba Prefecture (currently Futtsu City) due to the head office and factory being burned to the ground by air raids
February 1953
Became a brand designated factory of the National Safety Agency (currently the Ministry of Defense)
December 1953
JIS labeling approved for 0.01mm dial gauge
September 1957
JIS labeling approved for 0.001mm dial gauge
September 1959
Started production of a vernier caliper equipped with dial
November 1961
JIS labeling approved for cylinder gauge
January 1962
Capital raised to 25 million yen through a stock increase
May 1966
Capital raised to 75 million yen through a stock increase
September 1969
Construction of the head office building (five stories) completed
November 1971
Hideo Ozaki appointed the president
August 1973
Capital raised to 100 million yen through a stock increase
May 1974
Opened Kansai Sales Office (Osaka)
July 1975
Dial plumb bob released on the market
July 1976
Digital linear gauge released on the market
October 1980
Opened Chubu Sales Office (Nagoya)
May 1990
Construction of the head office building (seven stories) completed
October 1991
Opened Tohoku Center (Akita)
April 1998
Yoshito Ozaki appointed the president
November 1999
ISO9001 certification acquired
April 2002
Hiroshi Tsukagoshi appointed the president
July 2005
Employee stockholder's club inaugurated
April 2016
100th anniversary of the establishment of OZAKI MFG. CO., LTD.


